
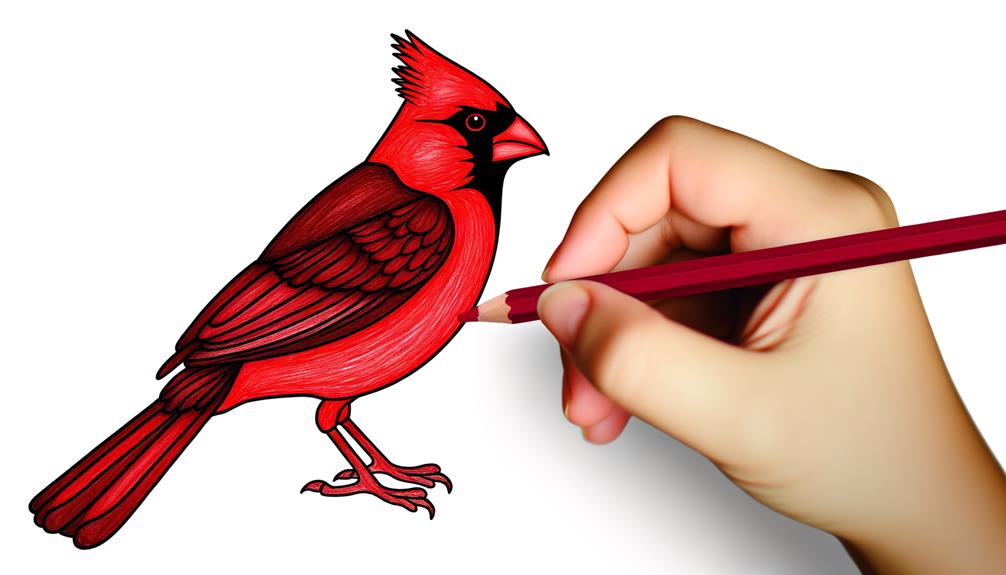
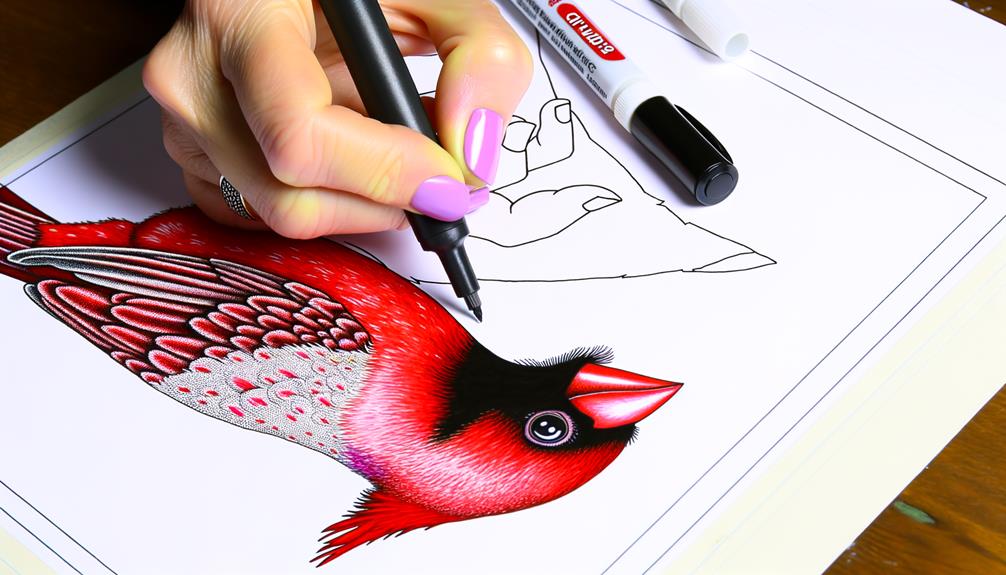
10 Simple Steps to Draw a Red Cardinal
Start your red cardinal drawing by understanding its anatomy and selecting quality art supplies. Sketch out the basic shape, focusing on its unique features like the pointed crest and long tail.
Use vibrant red paints for its plumage, starting with an oval for the body and the head. Draw the eye, beak, crest, then detail its robust body and feathered tail.
Accentuate with shadows and highlights to bring the cardinal to life. With a bit of patience and creativity, your canvas will soon boast a stunning red cardinal! As you progress further, you'll explore how to add more intricate elements.
Key Takeaways
- Start your sketch with basic shapes like ovals for the cardinal's head and body, then add detailed features.
- Use a vibrant palette of reds to capture the cardinal's unique plumage, layering paint for intensity and dimension.
- Pay special attention to the tail structure, using warm, bright red to depict the feathers and movement.
- Enhance your drawing with shadows and highlights, using dark red for shadows and lighter shades for highlights.
- Finalize your artwork by refining details, adding texture, and personalizing with unique touches and your signature.
Gather Your Art Supplies

Ready to bring a vibrant red cardinal to life on your canvas?
First things first, let's gather your art supplies. You'll need a quality canvas, something sturdy and durable. This is your freedom wall, where your creativity will unfold, so choose wisely.
Grab your brushes, make sure they're clean and ready. You'll need a good selection, from broad strokes to fine lines. Your paints are important too. Acrylics work well for their bright colors and quick dry time. We're aiming for the bold red of a cardinal's wings, so don't forget your crimson, scarlet, and deep maroon. A palette knife is handy for mixing colors. A pencil for sketching your initial design will also be vital.
Now, let's immerse into creating your masterpiece!
Understanding the Cardinal's Anatomy
Now that your art supplies are all set, let's take a close look at our muse: the anatomy of a cardinal.
- Crest: Cardinals are known for their distinctive, pointed crest. It's an essential feature that gives the bird its regal appearance.
- Beak: Their beaks are sharp, robust, and perfectly suited for cracking seeds. It's also a vibrant orange, adding a burst of color to their overall appearance.
- Body: They've a plump body that tapers down to a long tail, with a rounded chest.
- Coloring: The males are a vibrant red while the females are a more subdued brown with reddish hues.
Understanding the anatomy of a cardinal is important for you to capture its essence on paper. So, study these features, feel the freedom in your artistic exploration, and let's move on to our next step.
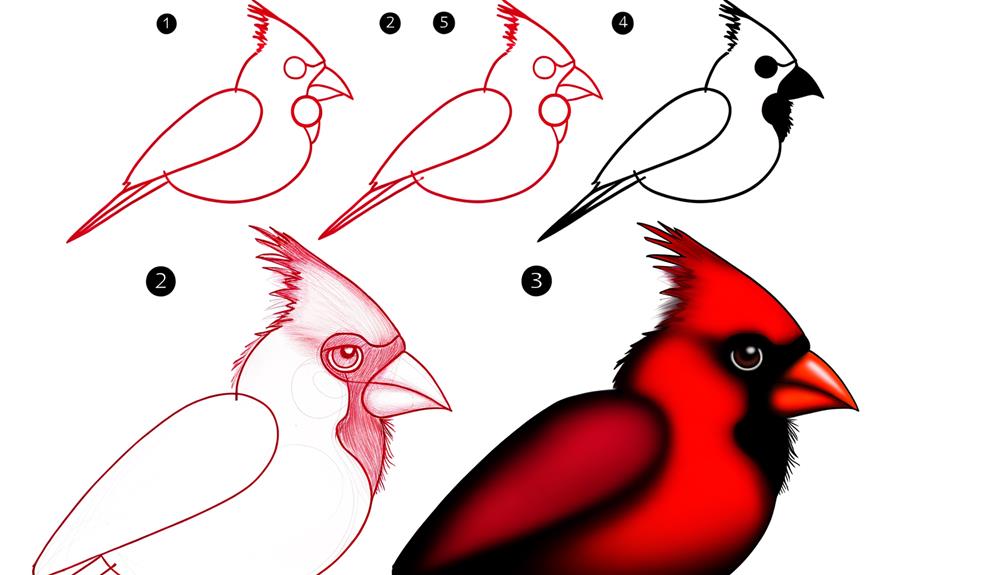
Sketching the Basic Shape
With a clear image of a cardinal's anatomy in mind, let's begin by lightly sketching the bird's basic shape, starting with a small oval for the head and a larger one for its plump body. This initial stage is about freedom; allow your hand to flow naturally, don't worry about getting it perfect right away.
Next, mark a line down the middle of your larger oval, this will help you locate the bird's center and maintain symmetry. Now, draw a triangle pointing downwards for the tail. It's your drawing, let it be as long or short as you feel fits right.
Afterward, lightly sketch two lines on the sides of the body oval for wings. Remember, these are just guidelines, you're free to adjust them as you see fit.
Drawing the Cardinal's Head
Now, let's turn our focus to the cardinal's head.
You'll start by sketching its basic shape, then gradually add detailed features to bring it to life.
Don't forget to take extra care when perfecting the beak, as it's an essential feature that truly makes your drawing recognizably a cardinal.
Sketching the Basic Shape
Before you can capture the bright, distinctive details of a cardinal, you'll need to start with a basic sketch of its head, which resembles a rounded triangle with a pointed tip.
Here's a simple four-step guide to get you started:
- Begin by drawing a light circle. This will act as a guide for the cardinal's head.
- Next, draw a smaller circle within the first one. This will be the cardinal's cheek area.
- Now, extend a line diagonally from the smaller circle, creating a pointed beak shape.
- Finally, erase the guiding circles, leaving only the basic shape of the cardinal's head.
Adding Detailed Features
Having sketched the basic shape of the cardinal's head, it's time to breathe life into your drawing by adding detailed features.
Start with the eyes, the windows to our feathery friend's soul. Draw a small circle for the eye, leaving a tiny white dot for the reflection.
Now, it's time for the distinctive black mask that makes the cardinal so unique. This mask starts just above the beak, curves around the eye, and ends at the back of the head. Use light strokes for this, you're free to darken it later.
Don't forget the tufted crest atop its head. Draw this as a series of connected, upward-curving lines. Add some texture by lightly sketching lines along the crest's curve.
You're not just drawing, you're creating a life on paper.
Perfecting the Beak
With the cardinal's soulful eyes and distinctive mask in place, let's turn our focus to the beak, the songbird's melodious instrument.
Here's how to perfect it:
Shape: Start with a straight line for the upper beak; it should be slightly longer than the head. Draw a shorter, curved line for the lower beak.
Detail: Add a tiny line at the beak's base, hinting at where it meets the cardinal's face.
Texture: Lightly sketch horizontal lines along the beak's length to mimic its ridged nature.
Color: Fill in the beak with a light orange, leaving a small white spot to show shine.
Detailing the Cardinal's Beak
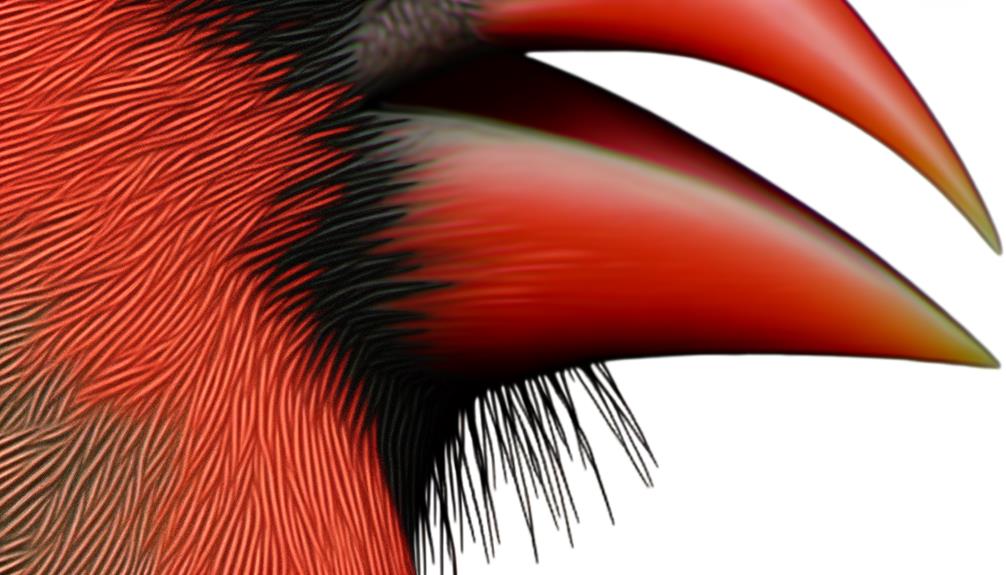
Start by sketching the cardinal's beak, a distinct feature that's shaped like a short, stout dagger, using a combination of straight lines and gentle curves for a realistic portrayal. Pay close attention to the beak's pointed tip – it's an essential detail that brings out the bird's character and tenacity.
Now, let's add depth. Shade the top part of the beak slightly darker, as it's often shadowed by the bird's brow. Then, enhance the lower part with a lighter shade to create a sense of dimension. Don't forget to add a thin, dark line to represent the beak's opening.
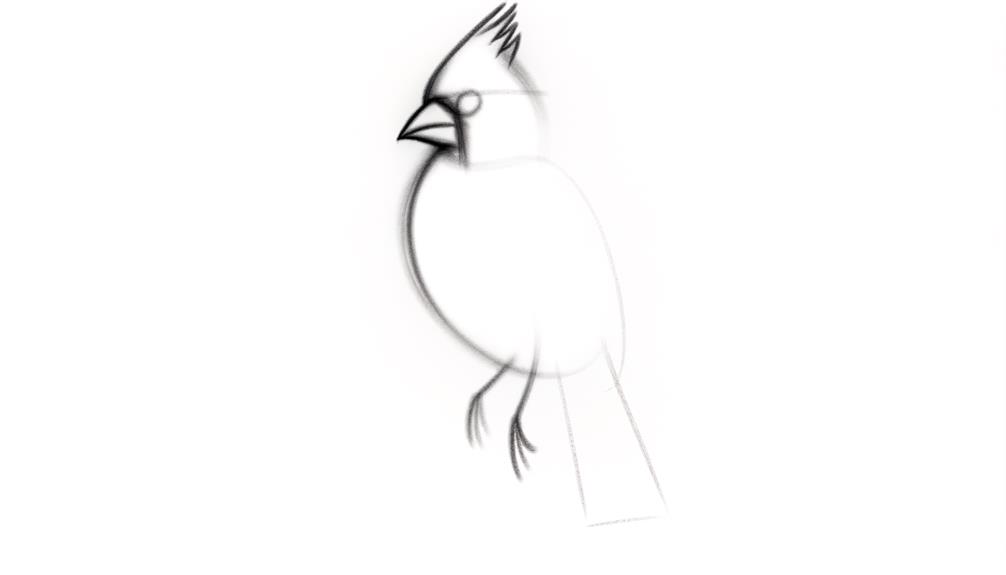
Illustrating the Cardinal's Body
Now, let's turn our focus to illustrating the cardinal's body. Start by sketching the basic shape, keeping it rounded and robust, a true depiction of the bird's hearty body.
Then, you'll add feather details, creating texture and movement with your pencil strokes.
Sketching the Basic Shape
First, you'll want to sketch a simple oval shape, which will serve as the base for the cardinal's plump body. Keep it light; you're just setting the foundation here.
Now, let's explore the four steps to flesh out our cardinal's form:
- Head: Draw a smaller circle intersecting the top of your oval. This will become the head of your cardinal.
- Beak: Draw a triangle protruding from the circle for the cardinal's distinctive beak.
- Tail: Sketch a long, slender triangle at the bottom of your oval for the tail.
- Wing: Add a curved line within the oval to indicate the wing's position.
Adding Feather Details
With a keen eye, you'll begin to etch in the feathery details, transforming your simple sketch into a lifelike cardinal.
Start by adding texture to your bird's body; short, curved lines work best to emulate the soft, downy feathers. Remember, cardinals have a crest, so focus on getting those feathers to stand out.
Next, work on the wings. They're layered, which gives them a great deal of depth. Use varying thicknesses of lines to suggest this layering; don't be afraid to get bold here.
For the tail, long, straight lines will do. Add the final touches to the eyes and beak, ensuring they're sharp and distinct.
Drawing a cardinal is about freedom: freedom to explore, to create, and to express. Enjoy this journey!
Shading the Cardinal's Wings
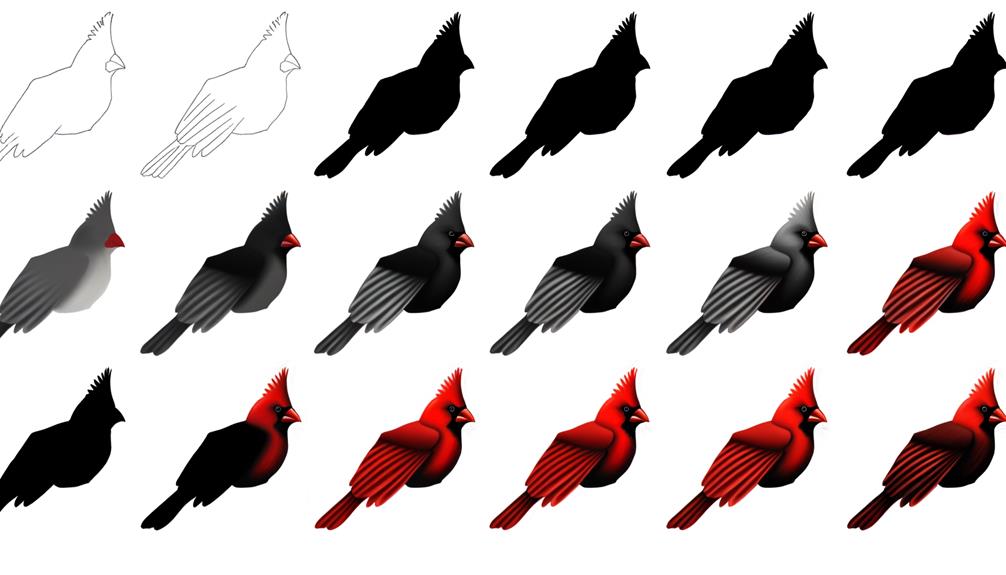
Gently layering your medium, whether it's colored pencils or pastels, will give the cardinal's wings that rich, vibrant red tone they're famous for. But don't just stop there. There's a certain technique to making this bird come alive on your canvas.
Here's a simple, four-step guide to help you:
- Start with a light base layer. This lets you build up the color intensity gradually.
- Add layers, always following the direction of the wing feathers. This helps create that realistic texture.
- Blend your colors. This evens out your shading and softens any harsh lines.
- Finally, add some small, darker streaks for depth and detail.
Defining the Cardinal's Tail
As you move from the wings to the tail of your cardinal drawing, pay close attention to the structure. It's about sketching elongated feathers, spread out like a fan, capturing the essence of a cardinal's tail.
Keep in mind, the correct blend of colors is vital – a dominant red with hints of black and white will make the tail come alive.
Tail Structure Basics
Now, let's explore the defining feature of our red cardinal: its tail. The tail of a cardinal isn't just a simple feathered appendage; it's a bold declaration of character, an attestation to the freedom the bird embodies. Here are four key elements to remember:
- Shape: The tail is broad at the base and tapers to a sharp point. It's longer than it's wide, giving the cardinal its distinctive silhouette.
- Feathers: It's composed of twelve feathers, each one a masterpiece of nature's design.
- Position: The tail is often cocked upwards, reflecting the cardinal's lively spirit.
- Movement: The tail moves as the cardinal flits about, creating fluid lines of motion in your drawing.
Coloring Techniques
Dipping your brush into a pool of rich, crimson paint, you're ready to breathe life into your cardinal's tail, capturing its vibrant hue and feathered texture. Start at the base of the tail, sweeping upwards in quick, short strokes to mimic the natural pattern of feathers.
Don't be afraid to layer your paint, gradually building up the intensity of the cardinal's fiery red plumage. Now, introduce a touch of black paint at the tip, creating a subtle gradient that shifts from a fierce red to a softer black.
This change hints at the bird's depth and complexity, adding dimension to your masterpiece. To wrap up, with a fine-tip brush, add delicate white highlights along the cardinal's tail feathers, reflecting the bird's natural sheen.
And there you have it – a beautifully colored cardinal tail.
Coloring the Cardinal Red
You've sketched your cardinal, and it's time to bring it to life with vibrant red hues. Embrace your artistic freedom and let's immerse into the process.
- Choose Your Red: Opt for a warm, bright red. Remember, cardinals are known for their fiery appearance.
- Start Light: Begin with a light touch, just hinting at the red. You're not aiming for full coverage yet.
- Build Intensity: Gradually layer more color to increase the intensity. Apply more pressure as you progress.
- Focus on Feather Texture: Use short, overlapping strokes to mimic the texture of feathers.
Coloring your cardinal red is more than just filling in lines—it's about creating depth and vibrancy that breathes life into your sketch.
Enhancing Shadows and Highlights
With your cardinal now displaying a fiery red hue, it's time to add depth and dimension by enhancing the shadows and highlights. Start by selecting a dark red to serve as your shadow color. Trace the areas where light naturally wouldn't hit, like under the wings and tail. These shadows give your cardinal weight and volume.
Now, for the highlights, choose a lighter red or even a soft pink. Gently color the areas where light would naturally fall, such as the top of the head and the edges of the wings. These subtle touches of light breathe life into your drawing.
Final Touches to Your Drawing
Having breathed life into your cardinal with shadows and highlights, it's time now to put the final flourishes on your masterpiece.
These finishing touches are your chance to make this drawing truly your own. Here's how to go about it:
- Refine the details: Double-check the beak, feathers, and eyes. Make them sharp and defined.
- Add texture: Use fine lines to suggest the softness of the feathers and the crispness of the eyes.
- Emphasize the color: Deepen the red of the cardinal, making it vibrant and lively.
- Sign your work: Your signature is your mark of freedom and individuality.
Conclusion
As the crimson hues of your cardinal burst forth, you'll see your masterpiece take shape.
The final touches are pivotal, the point where your cardinal truly comes to life.
Will the highlights and shadows you add create a lifelike creature? Or will it remain a mere sketch?
The choice is in your hands, as you add the subtle nuances that will make it jump off the page.
So grab your tools, it's time to finish your cardinal masterpiece.