
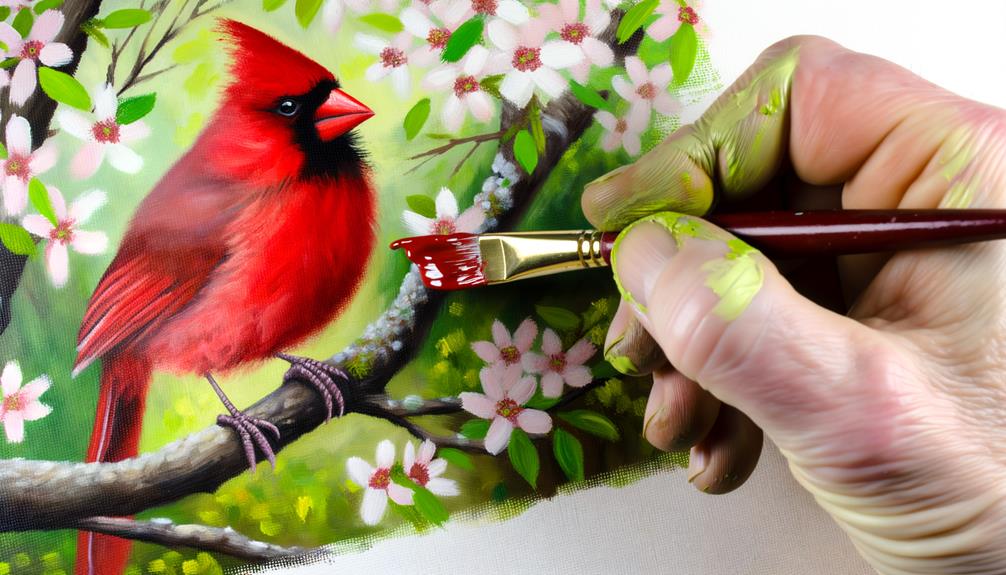
5 Easy Steps to Paint a Cardinal Bird
To paint a cardinal bird, start by gathering high-quality acrylic or watercolor paints in red, black, and white. Use fine-tipped and medium brushes on sturdy watercolor paper or canvas.
Sketch the bird's outline with basic shapes—an oval body, circle head, and triangle beak. Apply vibrant red for the body, bright orange for the beak, and deep black around the eye.
Enhance with detailed strokes for feathers using a fine-tipped brush. Add highlights using white or light gray for a natural glow.
Conduct a final review for minor adjustments. Follow these steps to transform your canvas into a vivid cardinal masterpiece.
Key Takeaways
- Start by sketching the cardinal's basic shapes: an oval for the body, a smaller circle for the head, and a triangle for the beak.
- Apply vibrant red paint for the body and bright orange for the beak, allowing each section to dry before adding more layers.
- Use black paint around the eye area to create contrast and depth, and paint the legs with a muted brown.
- Refine feathers with a fine-tipped brush, incorporating subtle color variations for realistic texture and depth.
- Add final details with precise lines and highlights using a fine-tipped brush to bring the painting to life.
Gather Your Materials
Before embarking on your artistic journey to paint a cardinal bird, it is crucial to gather all the necessary materials to secure a smooth and enjoyable process.
Begin with high-quality acrylic or watercolor paints in shades of red, black, and white, as these will showcase the cardinal's vibrant plumage. A selection of fine-tipped and medium brushes will assist in detailing and broader strokes.
Choose sturdy watercolor paper or canvas as your painting surface to ensure longevity. Furthermore, a palette for blending colors, a cup of water, and paper towels for cleaning brushes are essential.
Lastly, having a reference photo of a cardinal on hand will offer inspiration and accuracy. With these materials prepared, you are well-prepared to start your painting.
Sketch the Outline
To begin sketching the outline of your cardinal bird, lightly draw the basic shapes and proportions using a pencil to establish a strong foundation for your painting. Start with an oval for the body, positioning it slightly tilted to capture the bird's natural posture.
Next, sketch a smaller circle for the head, ensuring it is proportionate to the body. Add a triangle for the beak, aligning it accurately with the head.
Outline the wings using gentle curves extending from the body, and sketch the tail feathers with slightly more angular lines emanating from the rear.
Base Colors and Shapes
With your outline complete, start by applying the base colors to establish the foundational shapes and tones of the cardinal bird. Begin with a rich, vibrant red to cover the body, ensuring even coverage to capture the bird's striking appearance. Use a medium-sized brush for broad strokes, focusing on smooth, consistent application.
Next, paint the beak with a bright orange hue, carefully defining its shape. For the bird's face, apply a deep black around the eye area, creating contrast and depth. Don't forget the legs; a muted brown will suffice.
Work methodically, allowing each section to dry before layering, to avoid color blending. This methodical approach sets the stage for adding intricate details and texture in subsequent steps.
Adding Details and Texture
Enhancing your painting with intricate details and texture will bring the cardinal bird to life, emphasizing its unique characteristics and vibrant plumage. Begin by refining the feathers with a fine-tipped brush, using short, deliberate strokes to mimic their natural pattern. Pay special attention to the wing and tail feathers, incorporating subtle variations in color to create depth.
For the bird's beak and eye, employ precise lines to highlight their distinct shapes. To achieve realistic texture, layer thin glazes of paint, allowing each layer to dry before adding the next. This technique will build dimension and richness, making the cardinal appear more lifelike.
Encourage yourself to observe real-life references, adjusting your work to capture the cardinal's true essence.
Final Touches
As you approach the final touches of your cardinal bird painting, focus on enhancing the bird's natural glow and ensuring all elements harmonize seamlessly.
Use a fine-tipped brush to add highlights on the bird's feathers, especially around the head and wings, to give a sense of depth and light reflection. Subtle strokes of white or light gray can accentuate the eyes for a lifelike sparkle.
Examine the background and blend any harsh lines that may distract from the subject.
Finally, step back and evaluate the overall composition; make minor adjustments as needed to balance color and detail.
This meticulous attention will bring your cardinal bird painting to life, leaving you with a striking and well-finished piece.
Conclusion
The meticulous process of painting a cardinal bird juxtaposes the simplicity of gathering materials with the complexity of adding intricate details.
The fundamental steps, from sketching the outline to applying base colors, build a foundation that transforms through the addition of textures and final touches.
Mastery is achieved not merely through technical execution but through an attentive dedication to each phase.
This structured approach guarantees the creation of a vivid and realistic cardinal, encapsulating both art and nature.