
10 Steps to Paint a Stunning Male Cardinal
To paint a male cardinal, start by gathering high-quality acrylic paints, fine-tipped brushes, and a robust canvas. Sketch the bird's outline with geometric shapes, focusing on anatomical accuracy and symmetry.
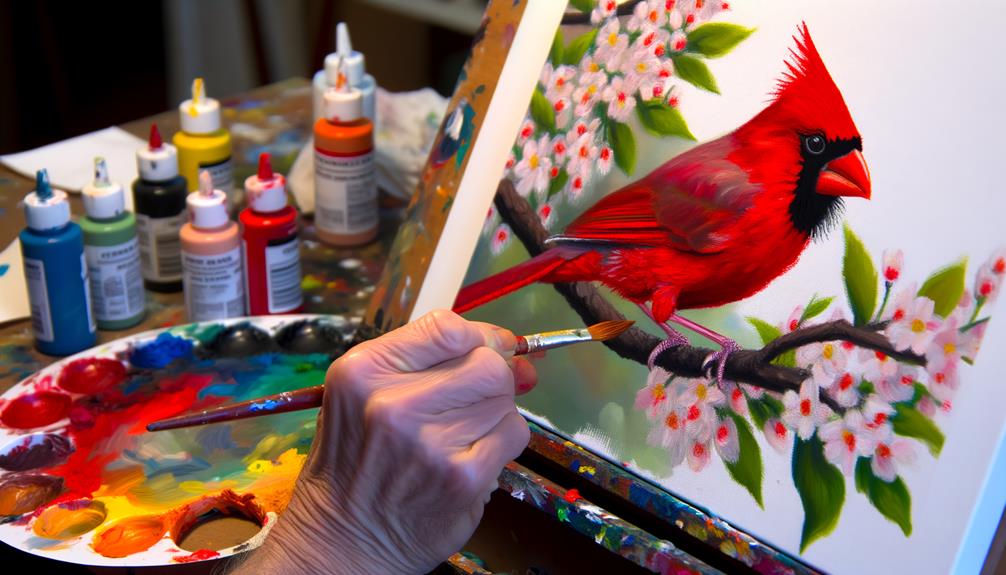
Apply a base coat of red to the body, then use darker reds for shadows. Paint the beak and legs using a blend of black and brown.
Detail the feathers with short, quick strokes, and add depth through successive layers. Accentuate highlights with controlled brushwork to mimic lighting conditions.
Finally, apply a thin glaze for color unity and enhance the appearance. There's more to explore to perfect your technique.
Key Takeaways
- Sketch the bird's outline on canvas, focusing on accurate proportions and symmetry using a reference image.
- Fill the body with a base coat of red and create depth with darker red shadows and highlights.
- Paint the beak and legs using a mix of black and brown for natural shading and detail.
- Create feather texture and dimension with short, quick strokes and layer colors seamlessly.
- Apply final highlights and a thin glaze to unify colors, enhance realism, and protect the painting.
Gather Your Materials
Before you start painting a male cardinal, make sure you have gathered necessary materials such as high-quality acrylic paints, a variety of fine-tipped brushes, a robust canvas, and a palette for blending colors.
Choose pigments with high lightfastness to guarantee durability. You'll require brushes ranging from size 0 to 3 for intricate work, allowing accuracy in capturing the cardinal's vibrant plumage and delicate anatomical features.
A resilient canvas, ideally primed, will offer a uniform painting surface, reducing texture interference. Use a palette with sufficient mixing area to achieve precise color shading and seamless shifts, particularly for the cardinal's vivid red feathers.
Sketch the Cardinal
Begin by outlining the cardinal's basic geometric shapes, such as the ovoid for the body and the triangular shape for the beak.
Next, incorporate key anatomical details like the distinct crest, wing feathers, and tail structure.
Pay attention to proportions and symmetry to guarantee biological accuracy in your sketch.
Outline Basic Shapes
Capture the essence of the cardinal by sketching its fundamental geometric shapes, such as ovals for the body and head, and triangles for the beak.
To guarantee anatomical accuracy, follow these steps:
- Head: Draw a small oval for the head, making sure it's proportionate to the body.
- Body: Sketch a larger oval beneath the head, slightly tilted to represent the cardinal's posture.
- Beak: Use a triangle to form the beak, attaching it precisely where the head oval intersects.
- Tail and Wings: Add elongated, tapered shapes for the tail and wings, aligning them with the body's curvature.
Maintain scientific rigor by focusing on proportional relationships, ensuring each shape accurately represents the cardinal's distinctive anatomy.
Add Key Details
With the basic shapes in place, refine your sketch by adding key anatomical details such as the cardinal's crest, eye ring, and feather texture.
Begin by sketching the distinctive crest atop the head, ensuring it shows the pointed, slightly curved feathers.
Next, outline the eye ring, a narrow band encircling the eye, which should be proportionate and symmetrical.
To capture the feather texture, delineate individual feather groups on the wings and tail using short, overlapping strokes to mimic natural plumage patterns. Pay attention to the feather direction, as it follows the body's contour.
Apply Base Colors
To apply the base colors, start by using a fine-tip brush to lay down an even layer of cadmium red on the cardinal's body, making sure you follow the natural contours and feather patterns. This foundational layer is essential for achieving anatomical accuracy and color vibrancy. Maintain consistent brush strokes to avoid streaking.
Next, address the cardinal's specific regions methodically:
- Head and Crest: Apply a slightly diluted cadmium red to capture the subtle gradient.
- Wings and Back: Use a denser pigment concentration for these areas.
- Tail Feathers: Extend your strokes outward, mimicking feather direction.
- Beak and Eyes: Switch to a smaller brush for precision, using a base of light orange for the beak and a dark brown for the eyes.
Adherence to these steps guarantees a scientifically accurate base.
Add Layering Techniques
To build color depth, apply successive thin layers of pigment, allowing each to dry before proceeding.
Focus on feather texture details by using fine brush strokes to mimic individual barbs and rachis structures.
Incorporate light and shadow through glazing techniques to create a realistic three-dimensional effect.
Building Color Depth
Building color richness in your painting of a male cardinal necessitates meticulous layering of pigments to achieve a lush, realistic texture. Start by applying a base layer of light red to establish the primary color tone. Once dry, gradually enhance intensity with successive layers, each slightly darker than the previous. This technique creates a sense of dimensionality and vibrancy.
- Base Layer: Use a light red acrylic or watercolor to establish the cardinal's overall hue.
- Mid-Tones: Add mid-tone reds to areas requiring moderate shadowing, maintaining a balanced color distribution.
- Shadow Layers: Intensify shadows using deeper reds and even maroon, enhancing the three-dimensional appearance.
- Highlights: Apply sparing amounts of lighter red or even white to accentuate areas where light naturally strikes.
This method guarantees a lifelike representation of color richness.
Feather Texture Details
Having established a rich, dimensional base color, you can now focus on creating the intricate feather textures that define the male cardinal's plumage.
Begin by using a fine-tipped brush to detail the barbs and barbules of each feather. Apply short, controlled strokes to mimic the natural patterns, paying attention to the overlapping arrangement.
Utilize varying shades of red and orange to highlight the rachis and differentiate feather layers. Incorporate stippling and crosshatching techniques to add depth and realism.
Guarantee the feather edges are irregular, reflecting their biological structure. Maintain consistency in the direction of the brushstrokes to simulate the cardinal's aerodynamic feather alignment. This meticulous layering will enhance the lifelike quality of your painting.
Light and Shadow
Understanding how light interacts with the cardinal's plumage is essential for adding realistic depth and dimension to your painting. Begin by observing how light source angles affect the bird's feathers.
Use layering techniques to simulate the play of light and shadow, enhancing the form and texture.
- Base Layer: Apply a flat, even coat of the cardinal's primary red color.
- Midtones: Add midtone layers to establish volume, using a slightly darker red for areas less exposed to light.
- Highlights: Introduce lighter shades of red and orange to the feathers that catch the most light.
- Shadows: Use deep reds and even hints of brown or black to accentuate shadows, particularly under the wings and tail.
These steps will create a multi-dimensional, lifelike representation of the male cardinal.
Detail the Features
Focus on the cardinal's distinctive crest, shaped like a sharp, upward-pointing triangle, as it provides a key feature for accurate depiction.
Observe the crest's texture, noting the individual feathers' arrangement and their slight curvature.
Detail the vibrant red plumage, ensuring you capture the gradient from the cardinal's head down to its tail.
Pay attention to the black mask around the beak and eyes, which contrasts sharply with the red feathers. This mask should be crisply defined to highlight the cardinal's striking appearance.
Don't forget the beak's conical shape and its vivid orange hue.
Accurately rendering these features will lend a lifelike quality to your painting, enhancing both realism and visual appeal.
Final Touches and Highlights
To achieve a refined finish, meticulously apply subtle highlights to the cardinal's feathers, emphasizing the play of light and shadow to enhance depth and realism. Focus on areas where light naturally strikes, using a fine brush and a lighter tint of red or orange.
Follow these steps for best results:
- Identify Light Sources: Determine where light falls on the cardinal to pinpoint highlight areas.
- Feather Texture: Use short, controlled strokes to mimic feather texture, ensuring highlights blend seamlessly.
- Contrast Adjustment: Gradually increase contrast by darkening shadows and lightening highlights.
- Final Glaze: Apply a thin glaze over highlighted areas to unify the coloration and add sheen.
Conclusion
Congratulations, you've transformed a blank canvas into a male cardinal masterpiece! If your bird resembles a red blob rather than an avian marvel, don't fret; it's abstract art, right?
Remember, your meticulous layering, precise brush strokes, and anatomical accuracy have culminated in a scientifically significant portrayal of Cardinalis cardinalis. Should anyone critique, simply explain the chromatic aberration and feather morphology.
Now, step back, admire your work, and revel in your ornithological and artistic prowess. You've earned it!